Airtightness and weather protection for walls
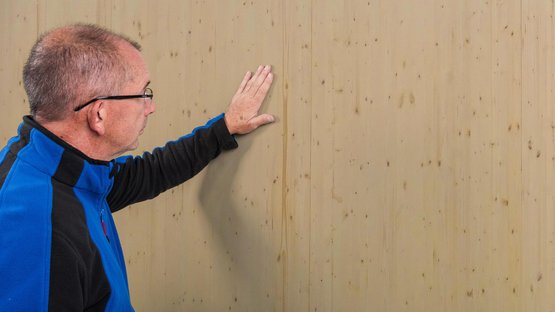
1. Check the subsurface
Apply pro clima TESCON PRIMER RP or TESCON SPRIMER to subsurfaces that have insufficient stability. Adhesion tests are recommended in certain cases.
In the case of wood-fibre insulation panels on the outside: it is recommended to apply primer to the edge areas as a minimum, particularly in exposed locations and depending on the surface finish.
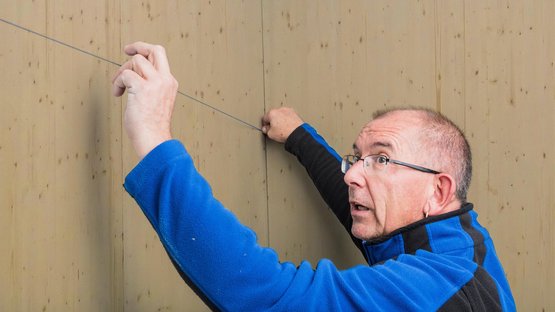
2. Mark the position
Decide on the position of the first membrane and mark this on the wall. Determine the membrane length.
2. Mark the position
Decide on the position of the first membrane and mark this on the wall. Determine the membrane length.
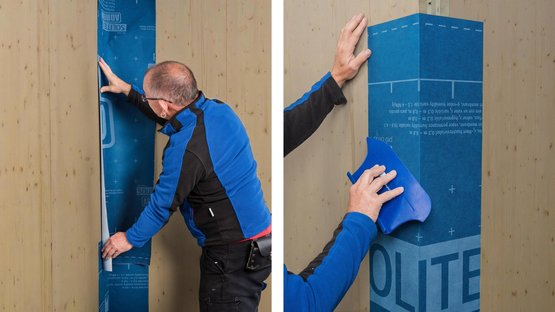
3. Seal the corners (with corner strip)
For interior corners and – if necessary – for exterior corners too, cut a strip of SOLITEX ADHERO that is at least 40 cm (16") in width and stick it in place with equal parts on each of the walls. Alternatively, tape can also be stuck over the corners (see Item 8).
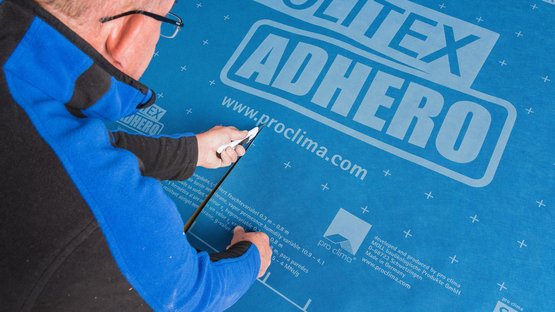
4. Cut the membranes
Cut the membranes down to the required length. There are markings to make your work easier.
4. Cut the membranes
Cut the membranes down to the required length. There are markings to make your work easier.
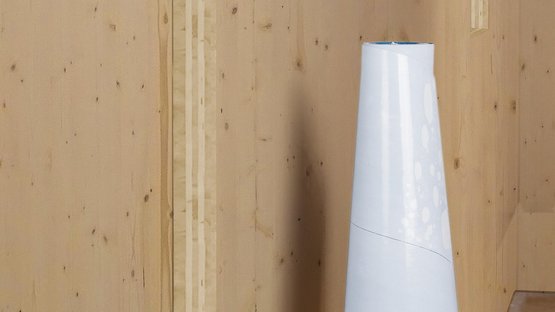
5. Roll out the cut pieces
Roll out the cut strips in such a way that the release film faces outward.
5. Roll out the cut pieces
Roll out the cut strips in such a way that the release film faces outward.
6. Remove the release film
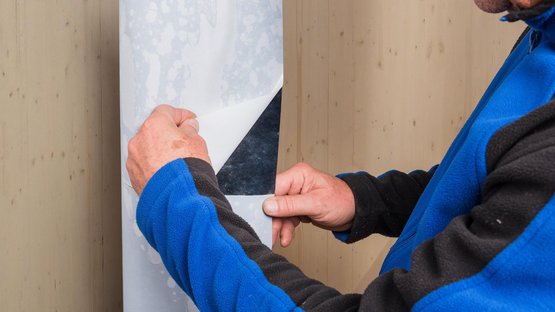
The release film is split into two parts that are 25 cm and 125 cm (10" and 49") wide. The 25 cm-wide application zone is stuck in place first in the description that follows. To ensure that the wider release film can be removed more easily later on, pull off a corner of this film and fold it over. This will then be easier to grip later on.
7. Apply the membrane (with corner strip)
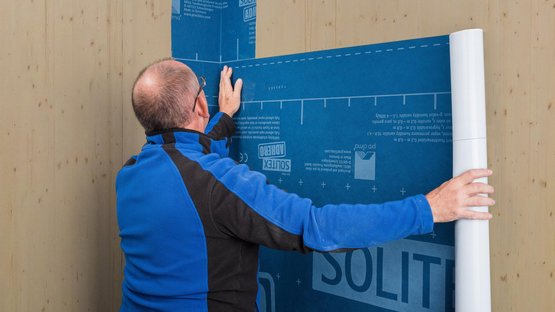
Remove approx. 20-30 cm (8"-12") of the release film of the upper application zone. Position the membrane at the marking (on the wall) and attach to the wall using the released part of the application zone. Ensure that the membrane covers at least 15 cm (6") of the corner strip.
8. Apply the membrane (without corner strip)
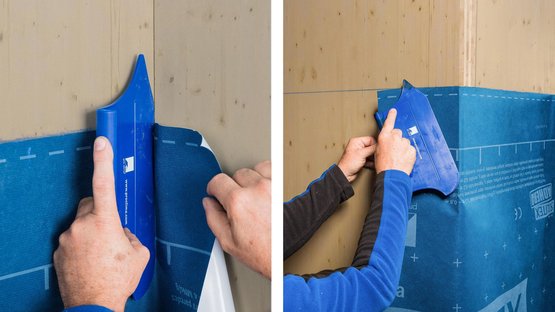
Remove approx. 20-30 cm (8"-12") of the release film of the upper application zone. Position the membrane at the marking (on the wall) and attach to the wall using the released part of the application zone. To form the corner, ensure at least 15 cm (6") of membrane continues around the corner. Work SOLITEX ADHERO into place using PRESSFIX XL and avoid hollows.
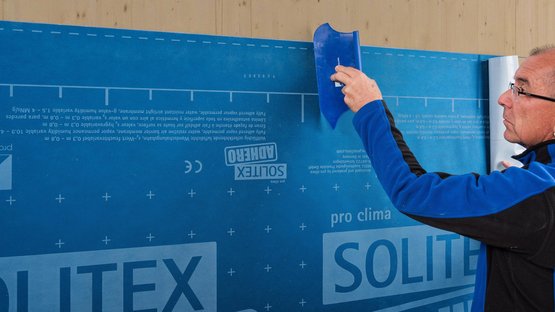
9. Stick the application zone
Continue rolling out the first membrane. Align it continuously with the marking. Gradually remove the release film of the application zone and stick in place. Rub using the PRESSFIX XL application tool to secure.
9. Stick the application zone
Continue rolling out the first membrane. Align it continuously with the marking. Gradually remove the release film of the application zone and stick in place. Rub using the PRESSFIX XL application tool to secure.
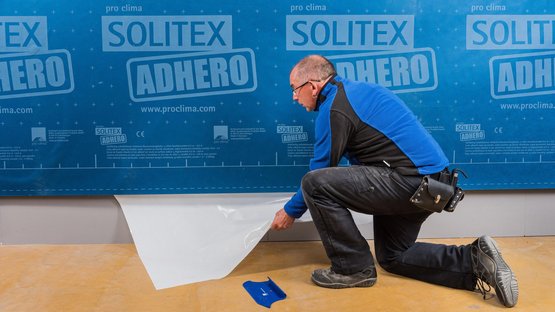
10. Remove the remainder of the release film
Grip the wide release film by the previously folded corner and pull it off.
10. Remove the remainder of the release film
Grip the wide release film by the previously folded corner and pull it off.
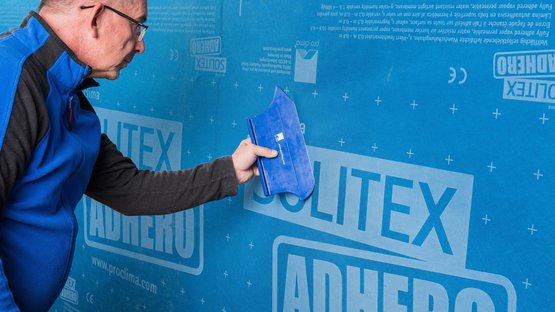
11. Stick to the subsurface
Rub the tape firmly into place using PRESSFIX XL and stick the tape to the subsurface, avoiding air bubbles and folds.
11. Stick to the subsurface
Rub the tape firmly into place using PRESSFIX XL and stick the tape to the subsurface, avoiding air bubbles and folds.
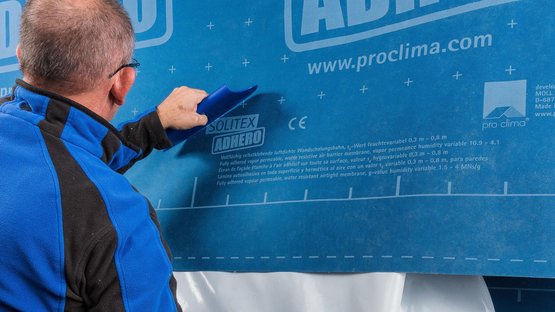
12. Install the remaining membranes
Apply all the remaining membranes - one by one - horizontally in an overlapping, waterproof manner. The procedure is as described above. The minimum overlap for membranes is 10-15 cm (4"-6"). Rub the membranes firmly into place using PRESSFIX XL, avoiding air bubbles and folds.
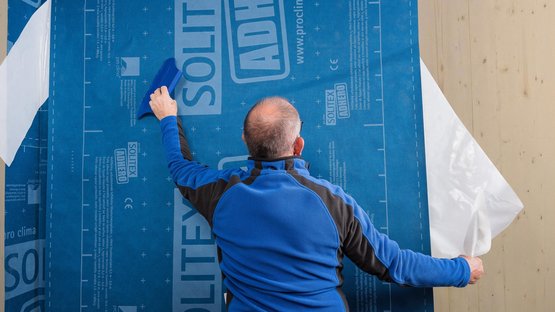
13. Alternative: Vertical installation
Attach SOLITEX ADHERO at the highest point. Gradually remove the release film strips by pulling them downward. Rub the membrane firmly into place using PRESSFIX XL, avoiding air bubbles and folds.
13. Alternative: Vertical installation
Attach SOLITEX ADHERO at the highest point. Gradually remove the release film strips by pulling them downward. Rub the membrane firmly into place using PRESSFIX XL, avoiding air bubbles and folds.
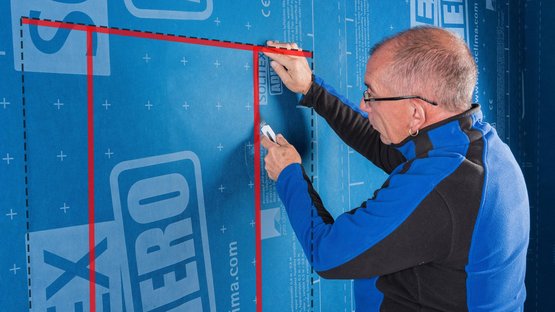
14. Cut out window openings
The membrane is first stuck over any window openings. To cut out the opening, cut the membranes as indicated with the red line using a cutter.
14. Cut out window openings
The membrane is first stuck over any window openings. To cut out the opening, cut the membranes as indicated with the red line using a cutter.
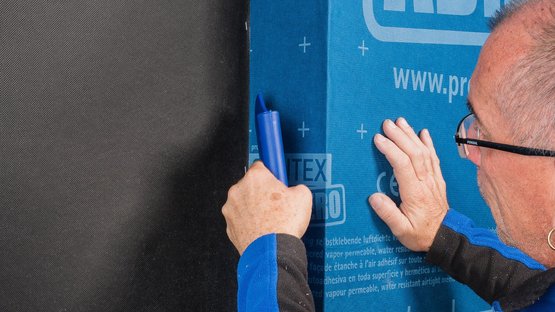
15. Stick the membrane into the reveal
Once SOLITEX ADHERO 1000/3000 has been cut out, fold it onto the reveal and stick it in place. Rub the membrane firmly into place using PRESSFIX XL, avoiding air bubbles and folds
15. Stick the membrane into the reveal
Once SOLITEX ADHERO 1000/3000 has been cut out, fold it onto the reveal and stick it in place. Rub the membrane firmly into place using PRESSFIX XL, avoiding air bubbles and folds
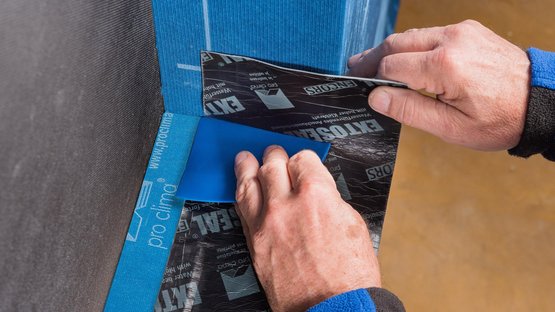
16. Form the sub-sill flashing
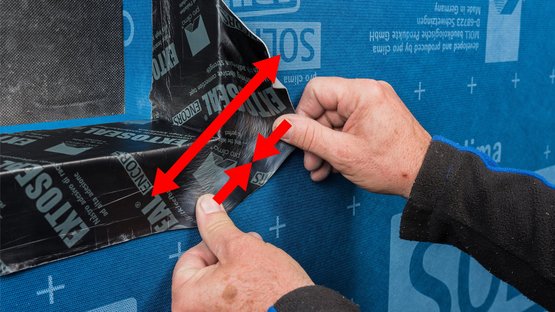
To form the sub-sill flashing, stick EXTOSEAL ENCORS to the wall below the window – onto an insulation wedge, for example – to ensure that water is guided to the outside. Have the tape protrude by at least 4 cm (1.6") at the face of the wall and stick at least 15 cm (6") of this tape onto the soffits. Avoid hollows by using PRESSFIX.
17. Stick the corners
Fold EXTOSEAL ENCORS onto the front side and stick it to SOLITEX ADHERO. Stretch the sub-sill flashing sufficiently at the corners and then stick it in place in a manner free of tension. Rub the tape firmly using the pro clima PRESSFIX application tool to secure the adhesive bond.
18. Seal window joints on the inside and outside
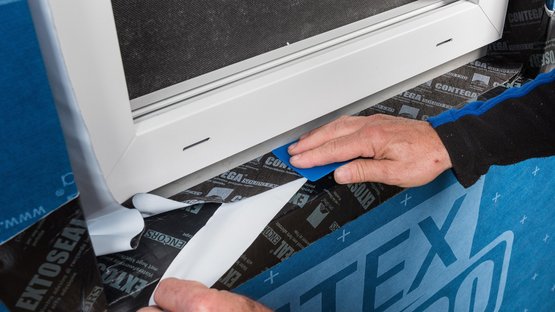
Apply window-sealing tapes (e.g. CONTEGA SOLIDO SL on the inside and CONTEGA SOLIDO EXO on the outside) to the window frame all around the window. Place the window into the opening, fasten it and then stick the tapes to the reveal all around the window. The pro clima WINDOW BOX brochures provide detailed installation recommendations.
18.1 Alternative: Sealing to flanged windows (USA)
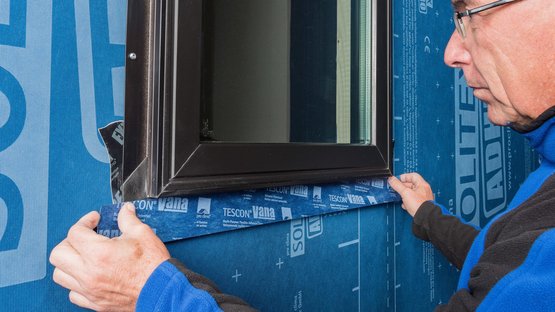
Insert the window, fasten it and the seal with TESCON VANA on SOLITEX ADHERO all around the window in a waterproof manner. Rub the tape firmly using the pro clima PRESSFIX application tool to secure the adhesive bond.
18.1 Alternative: Sealing to flanged windows (USA)
Insert the window, fasten it and the seal with TESCON VANA on SOLITEX ADHERO all around the window in a waterproof manner. Rub the tape firmly using the pro clima PRESSFIX application tool to secure the adhesive bond.
19. Sealing to rough subsurfaces
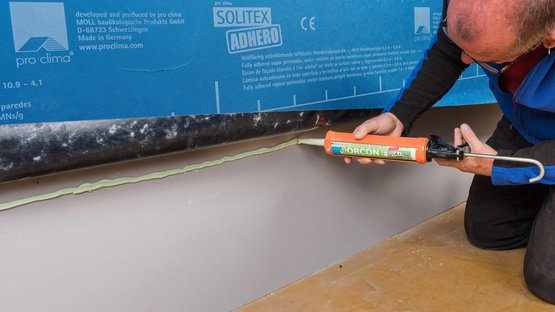
When sealing to rough subsurfaces such as concrete components, apply a line of the ORCON F adhesive sealant that has a thickness of at least d = 5 mm (1/4"); it may be necessary to use more on very rough subsurfaces: Apply the membrane strip to the adhesive bed, leaving slack to allow for expansion. Do not press the adhesive completely flat.
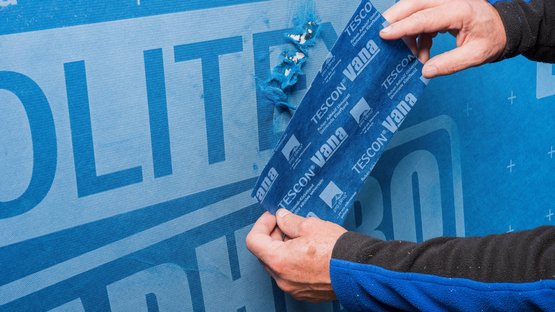
20. Repair of defects
Stick TESCON VANA in widths of 15 or 20 cm (6" or 8") over any defects in the membrane. Rub over the stuck surface using PRESSFIX XL.
20. Repair of defects
Stick TESCON VANA in widths of 15 or 20 cm (6" or 8") over any defects in the membrane. Rub over the stuck surface using PRESSFIX XL.
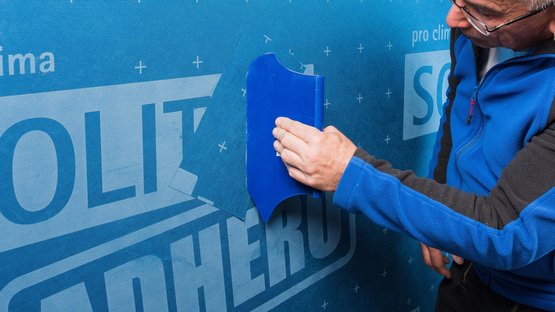
21. Alternative with SOLITEX ADHERO
As an alternative, defects can also be repaired by sticking a piece of SOLITEX ADHERO onto them. Rub over the stuck surface using PRESSFIX XL.
21. Alternative with SOLITEX ADHERO
As an alternative, defects can also be repaired by sticking a piece of SOLITEX ADHERO onto them. Rub over the stuck surface using PRESSFIX XL.
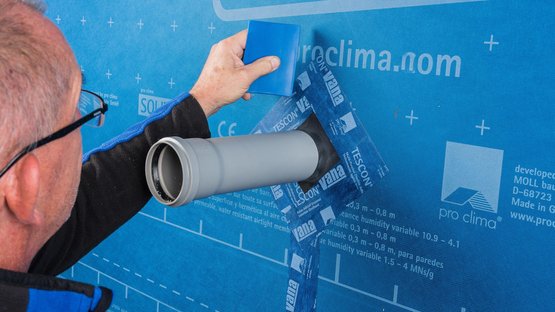
22. Pipe feed-throughs with ROFLEX
Seal pipe feed-throughs with a suitable ROFLEX grommet.
Stick the grommet to the subsurface using TESCON VANA. Rub over the stuck surface using PRESSFIX XL.
22. Pipe feed-throughs with ROFLEX
Seal pipe feed-throughs with a suitable ROFLEX grommet.
Stick the grommet to the subsurface using TESCON VANA. Rub over the stuck surface using PRESSFIX XL.
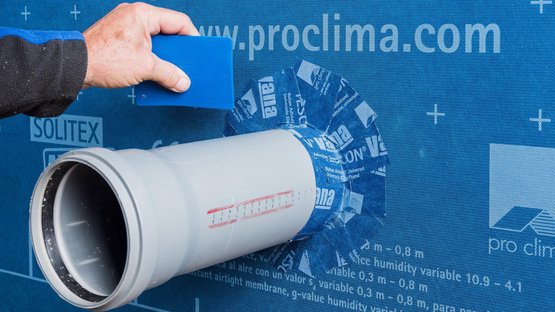
23. Alternative with TESCON VANA
Alternatively, the pipe feed-through can be sealed in an interlocking pattern from top to bottom in a waterproof manner using TESCON VANA.
23. Alternative with TESCON VANA
Alternatively, the pipe feed-through can be sealed in an interlocking pattern from top to bottom in a waterproof manner using TESCON VANA.
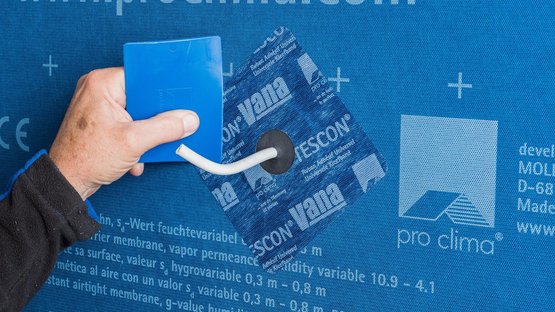
24. Cable feed-throughs with KAFLEX
Place a KAFLEX sealing grommet over the cable and stick it to the membrane. Rub the tape firmly using the pro clima PRESSFIX application tool to secure the adhesive bond.
24. Cable feed-throughs with KAFLEX
Place a KAFLEX sealing grommet over the cable and stick it to the membrane. Rub the tape firmly using the pro clima PRESSFIX application tool to secure the adhesive bond.
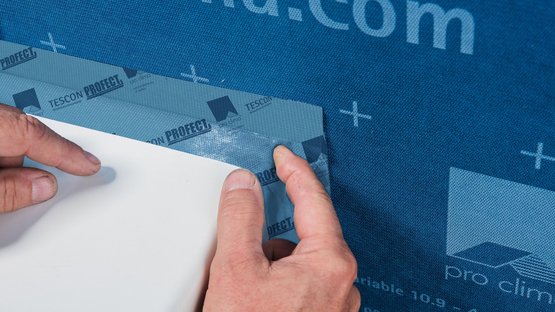
25. Angular penetrations
Seal angular penetrations using TESCON PROFECT. Rub the tape firmly using the pro clima PRESSFIX application tool to secure the adhesive bond.
25. Angular penetrations
Seal angular penetrations using TESCON PROFECT. Rub the tape firmly using the pro clima PRESSFIX application tool to secure the adhesive bond.
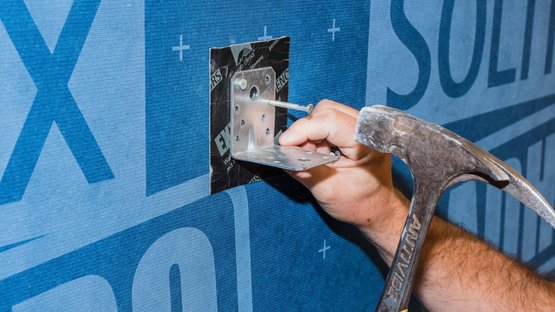
26. Sealing nail perforations
If brackets or similar parts are to be attached to the wall, use EXTOSEAL ENCORS for nail-sealing.
26. Sealing nail perforations
If brackets or similar parts are to be attached to the wall, use EXTOSEAL ENCORS for nail-sealing.
